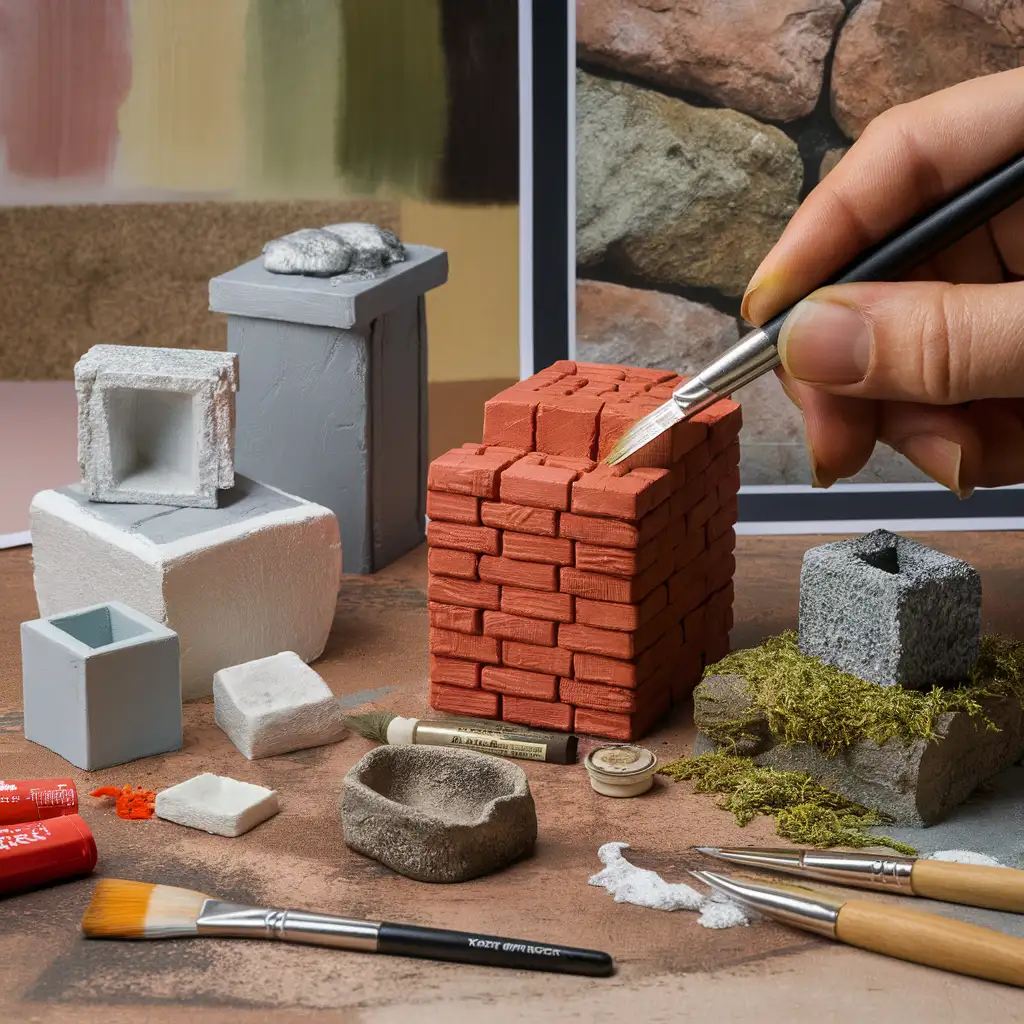
Creating realistic miniature blocks and miniature bricks is a vital skill for miniature artists and hobbyists who want to bring their projects to life. Whether you’re designing dollhouses, dioramas, or model buildings, mastering painting and texturing techniques will help you achieve lifelike and visually stunning results. This comprehensive guide explores step-by-step methods to paint and texture miniature blocks to perfection.
1. Preparing Your Miniature Blocks for Painting
Clean and Prime the Surface
To ensure a smooth and durable finish, start by cleaning your miniature blocks and miniature bricks. Use a soft brush or cloth to remove any dust or debris. Once clean, apply a primer that matches the material of your blocks (plastic, wood, or resin). Primer improves paint adhesion and sets the foundation for long-lasting results.
Plan Your Design and Color Scheme
Decide on the aesthetic you want to achieve. Are you aiming for weathered stone, rustic wood, or modern concrete blocks? Research real-world examples or photos for inspiration. Planning your color palette in advance ensures consistency and realism in your final project.
2. Painting Techniques to Enhance Miniature Blocks
Apply a Base Coat
Begin by applying a base coat to your miniature blocks. Acrylic paints are ideal due to their quick drying time and versatility. For stone blocks, use neutral tones like gray, beige, or off-white. For wooden textures, start with earthy browns.
Layering and Blending
To add depth and dimension, layer lighter and darker shades over the base coat. Use the following techniques for best results:
- Dry Brushing: Use a dry brush with minimal paint to highlight raised edges and create a worn, aged appearance.
- Stippling: Dab a stiff brush onto the surface to mimic rough textures, such as stone or concrete.
Weathering with Washes
Create a wash by diluting paint with water or a medium. Apply the wash to your miniature bricks to emphasize details like cracks and crevices. Wipe away excess wash with a cloth for a natural, weathered look. Use darker tones like black or brown for aging effects.
3. Adding Realistic Texture to Miniature Blocks
Use Texture Mediums
Texture mediums like modeling paste can be applied to miniature blocks to create rough or uneven surfaces. Use a palette knife to spread the paste and shape it into cracks or chips. Allow it to dry completely before painting.
Simulate Real Materials
- Stone Textures: Sprinkle fine sand onto wet paint to replicate a gritty, stone-like surface. Once dry, paint over it with natural stone colors.
- Wood Grain: Use a fine-tipped brush to paint wood grain patterns. Combine lighter and darker streaks for a realistic wooden effect.
- Brick Patterns: Carve brick patterns into foam blocks or use stencils to paint realistic brick designs on your miniature bricks.
4. Enhancing Details for Maximum Realism
Highlighting and Shadows
Use lighter shades to highlight edges and darker shades to create shadows in recessed areas. This technique adds depth and makes your miniature blocks appear three-dimensional.
Weathering Effects
- Rust Streaks: Use orange and brown tones to paint rust streaks on metal elements.
- Moss and Dirt: Apply green or brown washes to corners and crevices to simulate moss or accumulated dirt.
- Chipped Paint: Dab a sponge with paint to create peeling or chipped paint effects.
Seal Your Miniature Blocks
After completing the painting and texturing, apply a matte or satin varnish to protect your work. Sealing ensures durability and gives your miniature blocks a polished, professional finish.
5. Essential Tools and Materials
To achieve realistic effects, you’ll need the following tools and supplies:
- Paints: Acrylic paints in various shades, including neutral and earthy tones.
- Brushes: A mix of fine detail brushes, flat brushes, and stiff-bristled brushes.
- Primers: Spray or brush-on primers suitable for your block material.
- Texture Mediums: Modeling paste, sand, or grit for adding texture.
- Sealers: Matte or satin varnish to protect your finished work.
- Miscellaneous: Sponges, stencils, palette knives, and fine-tipped brushes.
6. Expert Tips for Painting and Texturing Miniature Blocks
- Experiment on Spare Blocks: Test new techniques on spare miniature blocks or bricks before applying them to your main project.
- Work in Layers: Build up colors and textures gradually for better control and more realistic results.
- Use Real-Life References: Study how light, shadows, and wear affect real-world materials to replicate those effects on your miniature blocks.
- Be Patient: Allow each layer of paint or texture to dry completely before moving to the next step.
7. Why Mastering Miniature Block Painting Matters
Painting and texturing miniature blocks and miniature bricks is more than just a craft—it’s an art form. By mastering these techniques, you can bring your miniature projects to life, making them visually captivating and impressively realistic. Whether you’re a beginner or an experienced miniature artist, these methods will elevate your creations and help you stand out in the world of miniature art.
Final Thoughts
With the right tools, techniques, and a bit of creativity, painting and texturing miniature blocks can be a rewarding and enjoyable process. By following this guide, you’ll gain the skills needed to create lifelike miniature bricks and blocks that enhance your dioramas, dollhouses, or model scenes. Start experimenting today and transform your miniature blocks into stunning works of art.


