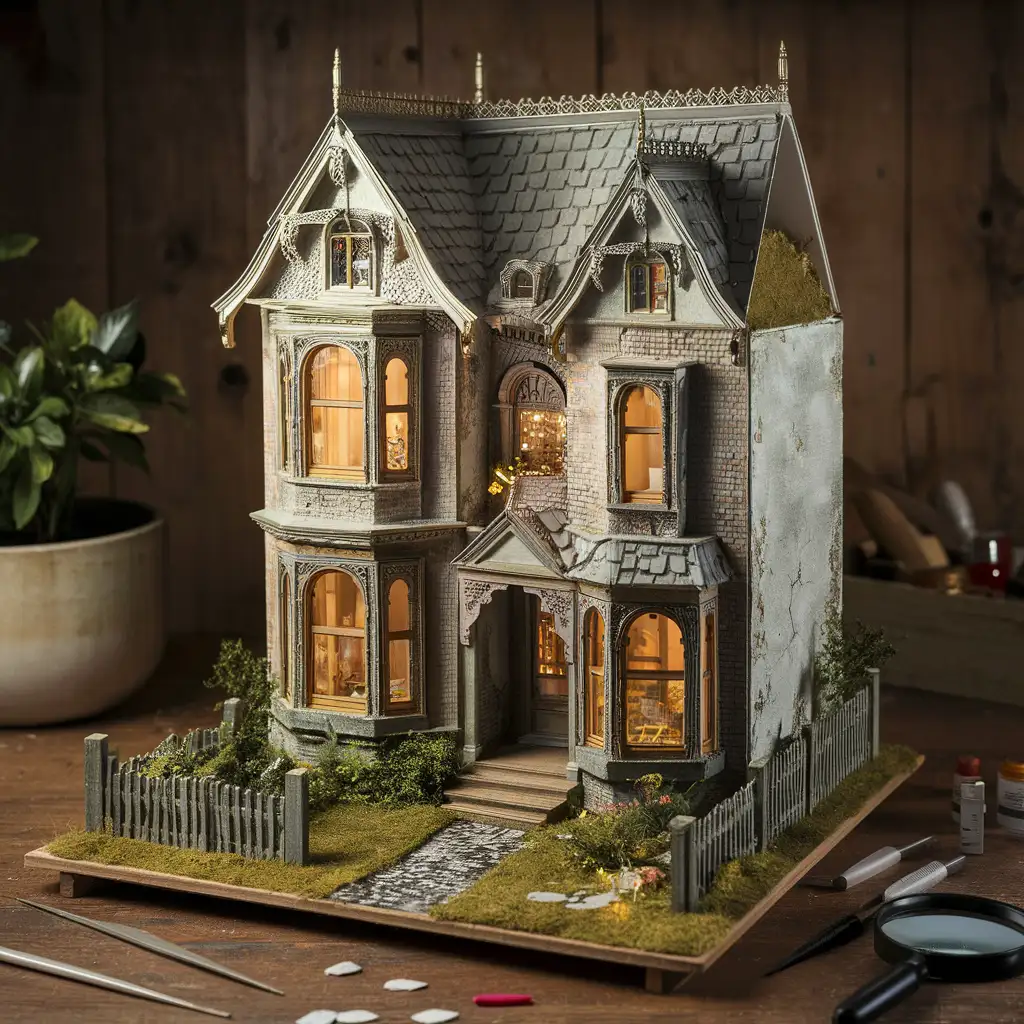
Designing realistic miniature block structures for dollhouses and dioramas is a rewarding hobby for DIY enthusiasts and model builders. With careful planning, the right materials, and creative techniques, you can transform miniature blocks and miniature bricks into lifelike structures that captivate and inspire. This guide provides step-by-step instructions to help you craft your dream miniature world.
1. Planning Your Miniature Block Project
Define Your Vision
A successful project begins with a clear purpose. Decide whether your miniature block structure will represent a cozy Victorian dollhouse, a busy urban diorama, or a peaceful countryside scene. This vision will influence your design choices and materials.
Draft a Blueprint
Create a simple sketch of your structure. Include dimensions, layouts, and key features. This visual guide will help you determine the types of miniature blocks, miniature bricks, and tools you’ll need for the project.
Select the Best Miniature Blocks
Choosing the right materials is essential for achieving a realistic look. Consider these options:
- Plastic miniature blocks: Perfect for sleek, contemporary designs.
- Wooden miniature bricks: Ideal for natural or rustic aesthetics.
- Resin blocks: Excellent for intricate details and textured finishes.
2. Building a Strong Foundation
Prepare a Stable Base
Start with a durable base made of foam board, plywood, or MDF. Ensure it is level and cut to the appropriate size to support your structure.
Lay the First Layer of Miniature Bricks
The first row of blocks sets the tone for the entire project. Use a strong adhesive and focus on precision to ensure a sturdy foundation.
Reinforce with Internal Supports
For larger designs, incorporate supports such as wooden dowels or metal rods. These reinforcements will keep your structure stable and prevent sagging over time.
3. Adding Realistic Details to Miniature Blocks
Texture and Weathering Techniques
Enhance the realism of your miniature block structures with these techniques:
- Sand wooden blocks lightly to create a worn, aged look.
- Use diluted paint washes to simulate dirt, rust, or weathered surfaces.
- Add small cracks or chips with a craft knife for added authenticity.
Incorporate Key Features
Add detailed elements to bring your miniature world to life:
- Windows and Doors: Craft custom pieces from thin wood or plastic sheets.
- Roofing: Use cardstock shingles or textured sheets for tiled roofs.
- Landscaping: Add miniature plants, pathways, and fences to complete the scene.
Install Lighting for Depth
LED lights can enhance the ambiance of your dollhouse or diorama. Position lights strategically to highlight specific areas and create dynamic visual effects.
4. Painting and Finishing Touches
Use High-Quality Acrylic Paints
Acrylic paints are versatile and quick-drying, making them ideal for miniature projects. Choose colors that complement your theme and apply them carefully for a polished look.
Seal Your Miniature Block Structure
Protect your paintwork with a matte or gloss sealant. This step ensures durability and gives your project a professional finish.
Add Final Accessories
Complete your structure with miniature furniture, decorative signs, or other small elements. These details add personality and make your creation feel vibrant and alive.
5. Overcoming Common Challenges
Maintain Precision
Use tools like magnifying glasses, tweezers, and rulers for intricate details. Keep your miniature blocks organized by size and color to streamline the building process.
Choose the Right Adhesive
Select an adhesive compatible with your materials. Test it on a small area first to ensure a strong bond without damaging the blocks.
Plan Your Time Effectively
Break your project into smaller tasks and set realistic goals. This approach keeps the process manageable and enjoyable.
6. Showcasing Your Miniature Block Creations
Photography Tips
Capture your work beautifully with these tips:
- Use natural light to highlight textures and colors.
- Experiment with angles to showcase different perspectives.
- Add props or backdrops to enhance the overall scene.
Post your creations on social media or join online communities for miniature builders. Interacting with others can provide inspiration and valuable feedback.
7. Expanding Your Miniature Block Skills
Experiment with Advanced Techniques
Try using 3D printing for custom pieces or resin for realistic water effects. These methods can take your projects to the next level.
Learn from Experts
Watch tutorials, read books, or attend workshops to gain new skills and ideas. Engaging with the community can open up endless possibilities for improvement.
Final Thoughts
Building realistic miniature block structures for dollhouses and dioramas is a creative and fulfilling hobby. By following these steps and experimenting with new techniques, you can transform miniature blocks and miniature bricks into stunning, lifelike creations. Begin your journey today and bring your miniature world to life!


